
- Joined
- Nov 9, 2023
- Messages
- 26
- Motherboard
- MSI MEG Z490I UNIFY
- CPU
- i5-10500T
- Graphics
- UHD 630
- Mac
- Classic Mac
- Mobile Phone
Saimon73's Comet Lake Macmini:
MSI MEG Z490I UNIFY - i5-10500T - UHD 630 - macOS Ventura

MSI MEG Z490I UNIFY - i5-10500T - UHD 630 - macOS Ventura
Components: New
MSI MEG Z490I UNIFY Motherboard with Built-In Thunderbolt 3 (Titan Ridge) Controller
https://www.newegg.com/p/N82E16813144301
Intel Core i5-10500T Coffee Lake Processor
https://www.newegg.com/p/2BH-004K-001P3
Corsair VENGEANCE 16GB (2x8GB) 3200MHz DDR4 Memory
https://www.amazon.com/dp/B0143UM4TC?tag=tonymacx86com-20
WD_BLACK SN770 500GB M.2 PCIe Gen4 - used for macOS
https://www.amazon.com/dp/B09QVPCJN2?tag=tonymacx86com-20
MSI Nightblade X2B - desktop case and PSU
https://www.amazon.com/dp/B00L222440?tag=tonymacx86com-20
Components: Already Owned
Samsung SSD 870 EVO 250 GB SATA SSD - used for Windows/Linux
https://www.amazon.com/dp/B08PC3PGZM?tag=tonymacx86com-20
Noctua NH-L9i - low profile cpu cooler
https://www.amazon.com/dp/B009VCAJ7W?tag=tonymacx86com-20
Components: Optional
BCM94360NG M.2 Key A/E WiFi/BT Module - to replace the on-board Intel WiFi/BT module
https://www.newegg.com/p/0XM-00JK-00083/
BCM94360CS2 M.2 Key M WiFi/BT Module - to install on second M.2 PCIe on the back of MB
https://www.amazon.com/dp/B07BQ976CR?tag=tonymacx86com-20
Flasher - to flash your TB3 chip
https://www.amazon.com/dp/B07SHSL9X9?tag=tonymacx86com-20
Comments
Component Choices:
Reading the Buyer's Cuide tonymacx86 the choice of the motherboard comes down to the H470/Z490 chipsets to normally worked Intel HD (I don't need dGPU). Also in future I would like to be able to upgrade to 11th Gen Intel Core, in particular, to have support up to PCIe 4.0 (NVMe/PCIe). So the choice comes down to the following boards:
- Gigabyte Z490I/H470I AORUS
- ASRock Z490-ITX Phantom ITX/TB3
- MSI MEG Z490I UNIFY
Asrock has a very large (in height) cooling system with fans and an Nvme sandwich, also quite expensive.
You won't see it in this list ASUS - consider this another nail in the coffin of that company, as a result, a large of them are saling (used).
For me, the choice was obvious towards MSI board in terms of price and market availability.
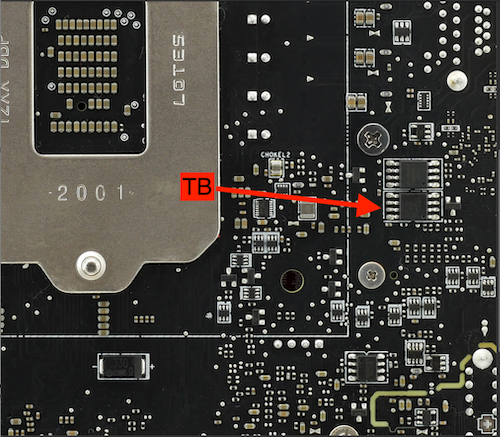
Notes, If you want Thunderbolt 3 support in the ITX form factor, only the ASRock Z490 Phantom Gaming ITX/TB3 and MSI MEG Z490I Unify have TB3 onboard. Both use the full-width 40Gbps, full-power 2.4W Intel JHL7540 TB3 chip.
I want to point out that not all of these motherboards are compatible in terms of replacement Intel AX201 with a BCM94360NG module. I found interesting table with compare MB by unlock/locked CNVI module:

Installation Notes
Online vs Offline Installer. Offline installers have a complete copy of macOS, while online installers are only a recovery image (~500MB) which then download macOS from Apple servers once booted.
Offline
- Can only be made in macOS, or
- Windows/Linux do not have the APFS/HFS drivers needed to assemble a full installer
- Can be made in macOS/Linux/Windows (guides on dortania GitHub, also you need to install python)
- Requires a working internet connection (you can check it in Recovery by starting Safari)
Recommendations for multi Boot (macOS/Windows/Linux):
I have NVMe for macOS and SATA disk for Windows/Linux, the bootloader is OpenCore.
I used Windows 10 because I disabled security TPM in BIOS and don't want issues with them in macOS.
- for Linux you only need to put OpenLinuxBoot.efi and ext4_x64.efi drivers in EFI folder and plist it in config.plist.
- for Windows you must use the same config.plist settings:
- Misc -> Boot -> LauncherOption = Full (enable Bootstrap shell, don't forget ResetNvram!)
- Kernel -> Quirks -> CustomSMBIOSGuid = YES (disable boot SMBIOS of macOS in Windows)
- Platforminfo -> UpdateSMBIOSMode = Custom (linked with previous)
Bootstrap shell allows you to add OpenCore to your motherboard's boot menu and prevent issues where Windows try to overwrite the EFI/BOOT/BOOTx64.efi path, which can breaking OpenCore's ability to boot.
UEFI Settings
First apply Optimized default

Post Installation:
To copy your EFI folder from flash drive to hard disk you need to mount it (put in terminal):
Code:
sudo diskutil list
//find your EFI volume
sudo diskutil mount disk0s1
//example, mount it
Code:
sudo spctl --global-disable; sudo mdutil -a -i off; defaults write com.apple.frameworks.diskimages skip-verify -bool true; sudo defaults write /Library/Preferences/com.apple.windowserver.plist DisplayResolutionEnabled -bool true; defaults write -g com.apple.mouse.scaling 12.0; defaults write -g CGFontRenderingFontSmoothingDisabled -bool NO; sudo pmset schedule cancelall; sudo chflags schg /Library/Preferences/SystemConfiguration/com.apple.AutoWake.plist; defaults write com.apple.dock autohide-delay -float 0; defaults write com.apple.dock autohide-time-modifier -float 0.1; killall Dock
//installation from any sources; disable Spotlight indexing; disable dmg packet validation; enable Retina resolution; change the cursor speed; font smoothing fix; wake-up fix from scheduled tasks; shorten Doc's response time and reboot it
sudo pmset autopoweroff 0; sudo pmset powernap 0; sudo pmset standby 0; sudo pmset proximitywake 0; sudo pmset tcpkeepalive 0; sudo pmset hibernatemode 0; sudo pmset ttyskeepawake 0; sudo pmset womp 0; sudo pmset sleep 0
//modes for correct sleep operation
Code:
/bin/bash -c "$(curl -fsSL https://raw.githubusercontent.com/Homebrew/install/HEAD/install.sh)"
//it also install the latest version of Xcode.
brew search...
brew install...
//some commands to install/search program.
CPU
By using ssdtPRGen.sh you must know, that 10th Gen Intel have an error " missing/unsupported processor models", so you can add to User Defined.cfg (/Users/.../Library/ssdtPRGen/Data) some value, in my case:
Code:
gUserDefinedCPUList=(
i5-10500T,35,1000,2300,3800,6,12

)Graphics
Framebuffer patching
I have dual 1920x1080 HDMI monitors, MB connectors: DP,HDMI,TB3. The main monitor use HDMI port, the 2nd - DP port by HDMI-HDMI cable frough the DP to HDMI adapter.
I picked up the working bus ID, used arg "force-onlain" (without it, doesn't enter even to recovery) and "igfxfw" (Apple firmware). Of course I use fake device ID from Coffee Lake (Macmini8.1) because On Comet Lake (10th gen) no mobile framebuffer.

I think the only one reasonable explanation for this is the lack of support for multiple hdmi by macOS on iGPU 10th Gen and as a result, the only solution is to replace HDMI displays on DP displays.
MonitorsControl
Optionally install MonitorsControl (GitHub) for adjusting brightness via F1/F2 keys
Monitor Control is supported on most but not all monitors. Your monitor needs to support DDC/CI for this app to work (Benq's are supported).

USB map
- All USB bus on 4xx intel chipset with device-id 0x34ed 0x06ed 0xa3af must be injected. The corresponding entry must be added to USB.kext
- I don't use front USB 2.0 9pin con front panel, if you use - it must be added to USB Map instead of other ports to follow with the 15 port limit on the controller. Or you must change XhciPortLimit quirk to "YES".
- The front panel USB-C port is set to Type 09 and uses SSP1 if the USB-C connector is plugged in one orientation, and SSP2 if the connector is flipped around and plugged in the other orientation.(USB Port Map by @CaseySJ)

I haven't other USB type-c/thunderbolt devices then Apple's iPhone, and it only supports USB 2.0 protocol, so Lightning-to-USB-C cable will also connect to HS08 port. So type-c(front panel)/TB3(back panel) XHC3 Controller USB Port Map done by USB Map Python script (GitHub) made approximately. All ports of XHC USB Controller verified.
Wifi/Bluetooth
To natively support Wi-Fi/BT to use AirDrop/Handoff you need Broadcom modules. There're 3 variants of using it:
- M.2 [Key-E] slot (BCM94360NG)
- M.2_2 [Key M] slot (BCM94360CS2)
- PCIe 3.0 x16 slot (FV-HB1200/FV-T919)
Replacing the onboard Intel with a Broadcom very simple. It sits in a small metal housing under the IO-shield. By removing the screws from the IO-shield, you can simply unplug the housing and replace the AX201 with the BCM94360NG. The original antennas fit onto the BCM94360NG.


- 1 x M.2 Socket (Key E), supports type 2230 WiFi/BT PCIe WiFi module
This motherboard supports only WiFi/BT modules that use PCIe and USB via the Key E M.2 socket - 1 x M.2 Socket (Key E), supports type 2230 Intel® CNVi
This motherboard support only CNVi - 1 x M.2 Socket (Key E), supports type 2230 WiFi/BT PCIe WiFi module and Intel® CNVi
This motherboard support both types
Anyway, I don't have BCM94360NG module and cannot confirm or deny these guesses. I use intel AX201 with relevant kexts, Wi-Fi/BT working good, bluetooth in peripherals is even defined as "Apple".

Thunderbolt
Thunderbolt has three modes of operation:
- cold boot - you need only to set the BIOS settings properly
- hot plug - SSDT-DTGP and SSDT-TB3HP (generate on HackinDROM Website), guide by @CaseySJ
- full mode - to flash your TB3 chip, guide by @CaseySJ
Some devices might work without it, even hotplugging. Others won't. If you have issues with your TB3 device and don't want to flash your TB3 chip, you can try to disable SSDT-DTGP and SSDT-TB3HP. Then hotplug doesn't work, but the device might work when it is connected on boot.
Flashing a modified firmware will activate the Thunderbolt Bus. Without flashing the TB3-chip with a modified firmware, you might have issues with Hotplugging some TB3 devices. e.g. TB3 eGPU case. It will only get it working when it will connected while booting macOS.

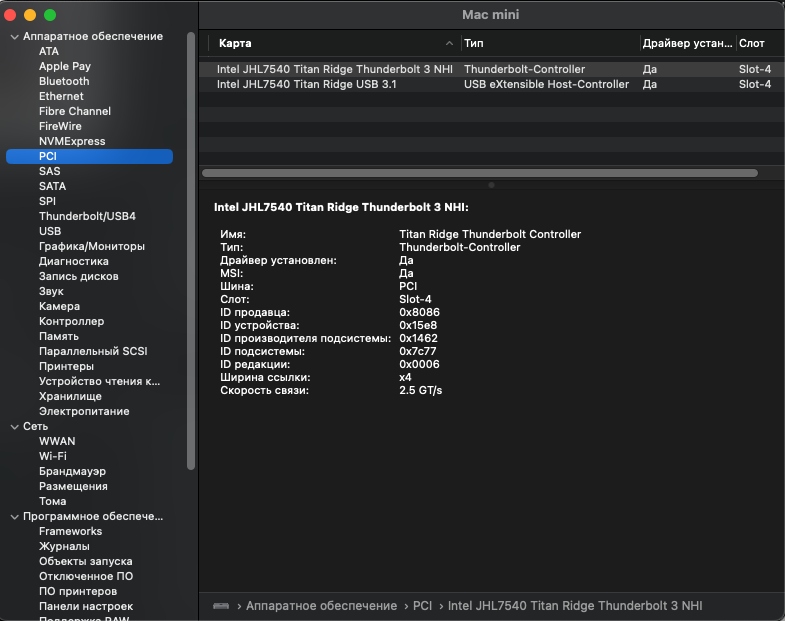
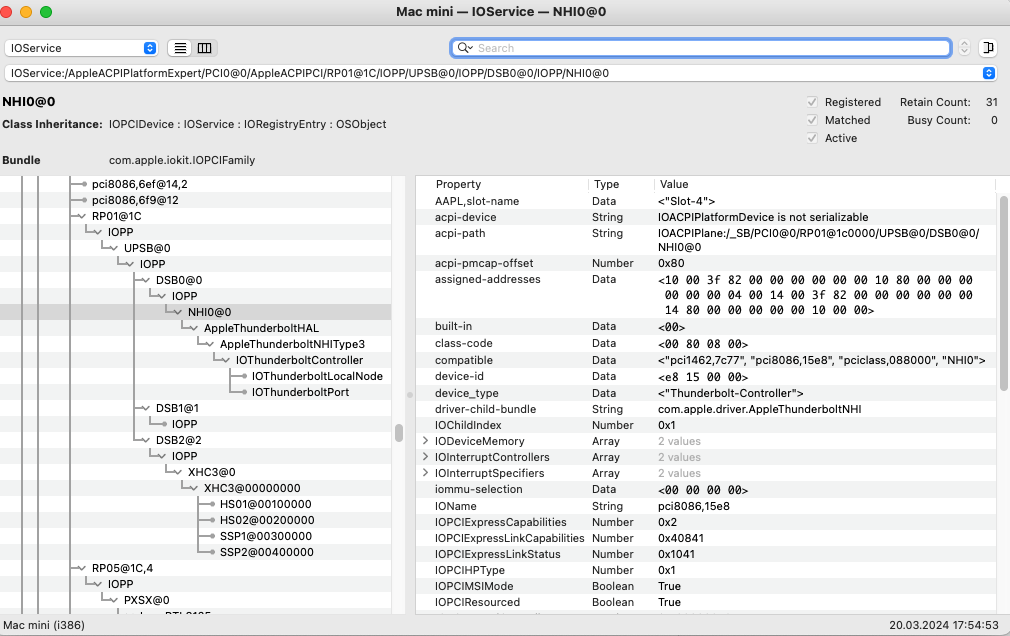
I have some issues: when I reboot after Windows session in macOS - I losting TB3 in IOReg/pci devices. After shut down PC and boot macOS TB3 come back and all is good.I haven't found a solution to this problem yet.
NVMe
Samsung's proprietary NVMe SSD controllers do not work well with macOS Monterey or Ventura. It doesn't look like a firmware fix from Samsung is ever going to be released, that will potentially lead to ultra long macOS boot times. This is TRIM and APFS related.

From the cumulative experience of hundreds of WD NVMe users here at tonymacx86.com we can conclude they are fast and reliable when used as a macOS boot drive. Specific WD models with their proprietary "in-house" controller are designed to be macOS compatible.

Note, that the SN750 SE has a lower cost Phison controller. Any of other WD models in that chart are a better choice (WD's in house controller).
WD Blue SN570 is the lowest price per GB of any of the recommended WD drives. It is PCIe Gen 3 and comes in sizes up to 2 TB. If you have an older PCIe 3.0 motherboard (Intel 10th gen or older) and need a large 1-2 TB boot drive, this is a great lower cost choice.
Full article "Choosing a Compatible NVMe SSD for your macOS Boot Drive" by @trs96.
I used WD_black SN750 500Gb for macOS (M2_1 slot) and in future I may be replace SATA SSD on NVMe WD_black SN570 1Tb for Windows/Linux/filestore (M2_2 slot).
Sound
On GitHub AppleALC.kext release history I found added ALC1220A layout 8 for MSI z490i unify by @viorel78 and use it.
To have working Boot-chime you need:
- Codec address of Audio controller, typically - the 1st audio codec address on audio controller (HDEF in IOReg). Failsafe value is 0.
- check Device path (PciRoot) of audio controller
- AudioOutMask. Play sound in UEFI to more than one channel. Failsafe value is -1 (output to all).

Ethernet
I used LucyRTL8125Ethernet.kext for Realtek® RTL8125B 2.5Gbps LAN controller without any problem (also work in Recovery mod).
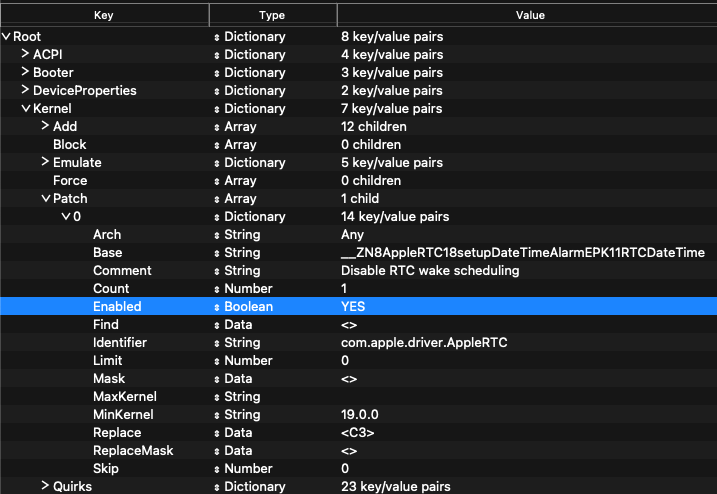
Sleep
Often problems with waking up are caused by Power Nap. You can disable it in System Preferences > Energy Saver or use a patch for his work:

Benchmarks
CPU

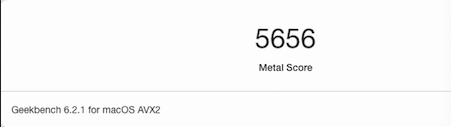
Metal
NVMe

OpenGl
