
- Joined
- May 12, 2012
- Messages
- 107
- Motherboard
- Gigabyte GA-B75M-HD3
- CPU
- i5-2500K
- Graphics
- GT 710
- Mac
- Classic Mac
- Mobile Phone
AppleMacidiot's G4 -->i5 Rebirth:
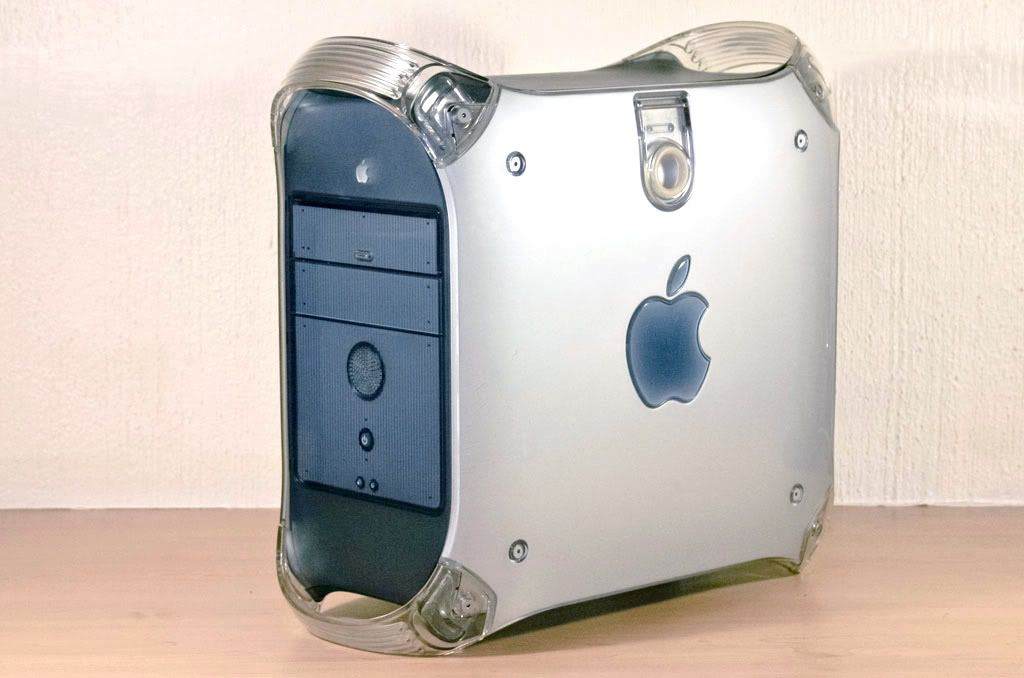
So my PowerMac G4 (Gigabit Ethernet) finally died last year.
After 11 years of excellent service and number of incremental upgrades (e.g. CPU, GPU, RAM) I really could not have asked more of the little guy. It was the PSU that eventually just said, "Sod it!" and croaked. While I could have trawled eBay for another one, let's face it, why the hell would I fork out a small fortune just to resuscitate an 11-year-old computer – as awesome as it was.
It was time to make a call, throw my beloved onto a recycling pile or give it another REAL shot at life. Well, I would't be here today if the recycling dump had claimed another victim, now would I? I loved that little sucker after all!
Components
Chassis: Apple Powermac G4 (Gigabit Ethernet)
CPU: Intel Core i5-2500k + Boxed CPU Cooler
GPU: AMD Radeon HD 6670 1GB (Reference card)
Motherboard: MSI H61M-E23 (B3)
Memory: Kingston Value Ram DDR3-1333 – 2x 4GB
WiFi: D-Link Xtreme N PCIe Adapter (DWA-556) For native WiFi in OS X.
HDD1: Kingston 128GB SSD
HDD2: Seagate Barracuda 2TB Green
PSU: Thermaltake TR2-500w
Fan: DeepCool UF-120
USB: D-Link 5x USB 2.0 PCI card This will be replaced with either a USB 3.0 or SATA III card soon.
eSATA: SATA-to-eSATA cable with PCI mounting bracket
The Build
Back to the beginning... we had a few extra AMD Phenom x4 965s lying around the office so my journey actually began with an AMD based system. I promptly picked up a nice AM3 Motherboard, some fans, a heatsink and a PSU and got to work. But to cut a long story short, before I'd properly mounted this setup into my G4, I had already negotiated a generous swap (with my boss) for an Intel Core i5 2500k + "BearUp Lake" mobo, which pretty much guaranteed that this was going to be a proper Intel-based Hackintosh. Oh yeah!
And so began the build... in earnest.
I mostly finished this guy around the New Year, but I wasn't 100% happy with the entire setup. The mobo was too wide so I had the classic problem with the second set of (empty) RAM slots crashing into the G4's optical bay enclosure, which I removed and installed my HDDs into (documented later). I also had the ol' Audio IO ports pushing into the PCI slot divider problem. While this was by no means a deal breaker, these things bugged the hell out of me. Grrr.
So last, I coughed up for a smaller MSI H61M-E23 (B3) mobo to solve these two issues and spent Saturday FINALLY get my G4 up to 100%. Of course I have already begun with the planning stages for my next project – a G5 chassis. I've got some great ideas, which will hopefully work out nicely... but first here's my G4 --> i5 Rebirth.
Enjoy...

First Cuts. Oh my! I'm actually doing this!

Snap, Crackle 'n' Pop. There go the original mono standoffs...

Yup! That ol' AirPort Card holder has to go too..

Some more cutting ahead. Here I used the existing indentation to guide me. I have plans for that there IO opening...

A quick test fit to see how things are lining-up.
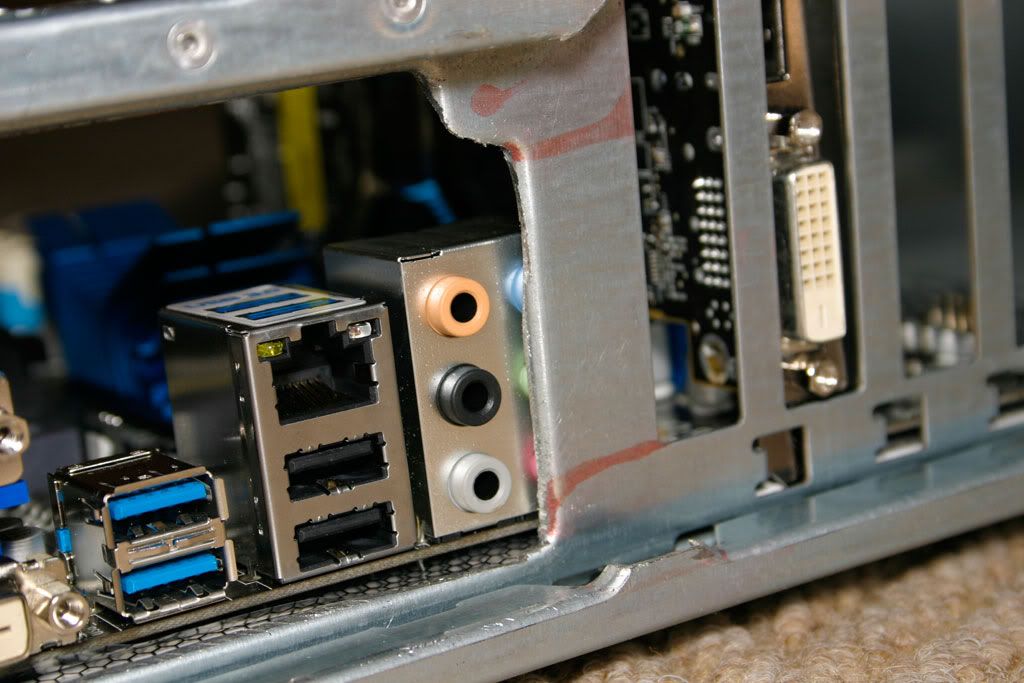
Yup! I KNEW IT! Darn Audio IO Ports were gonna be a bugger. Oh, Well!
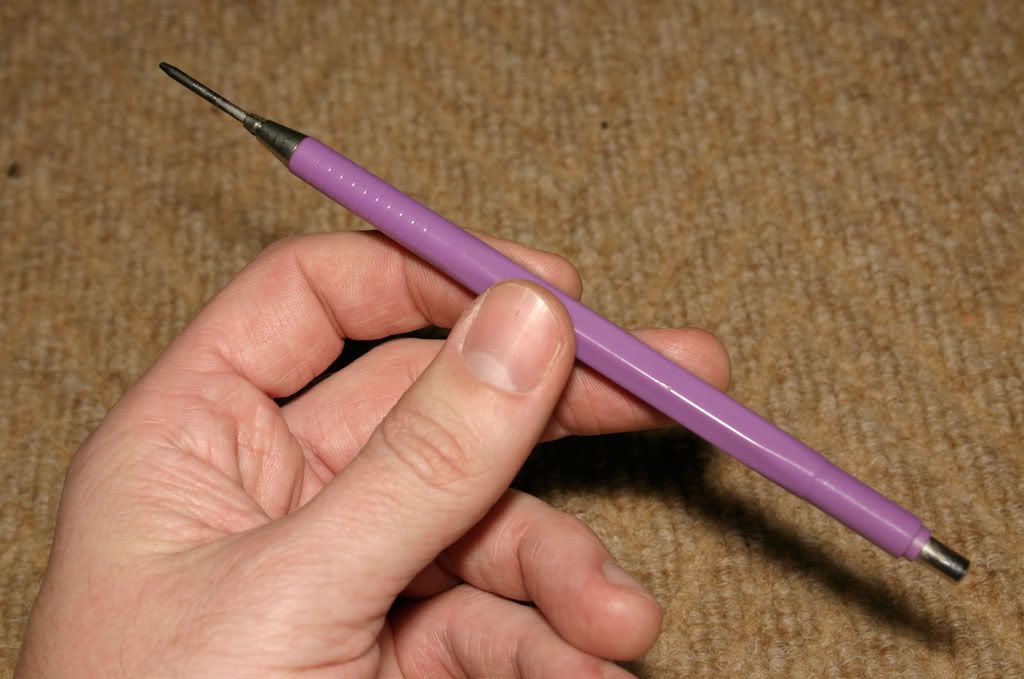
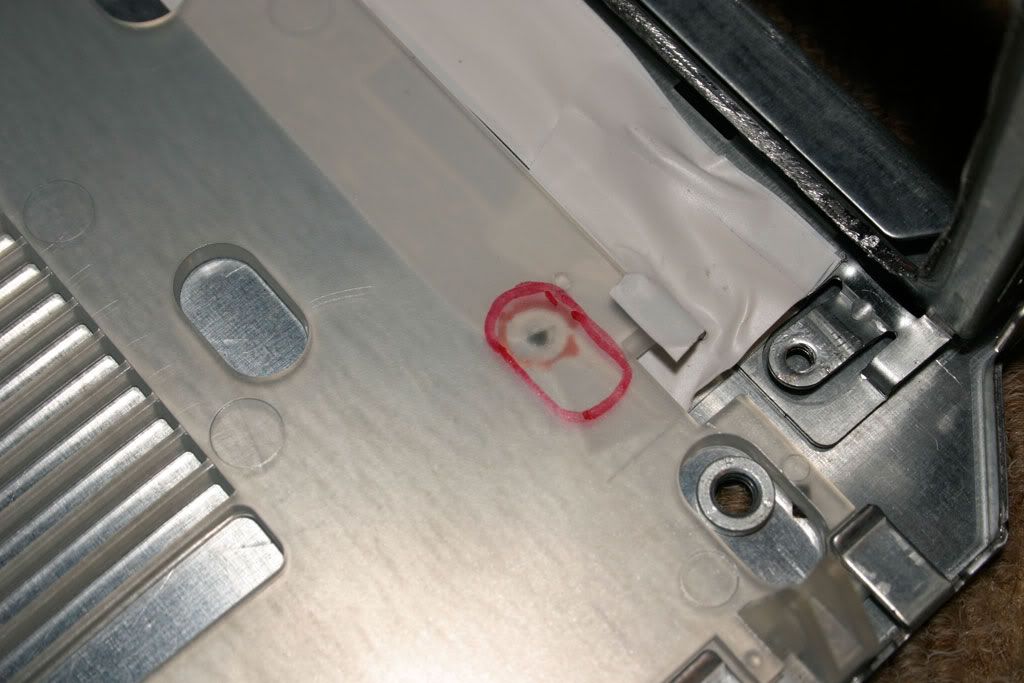
My very pink technical pencil. Yay!
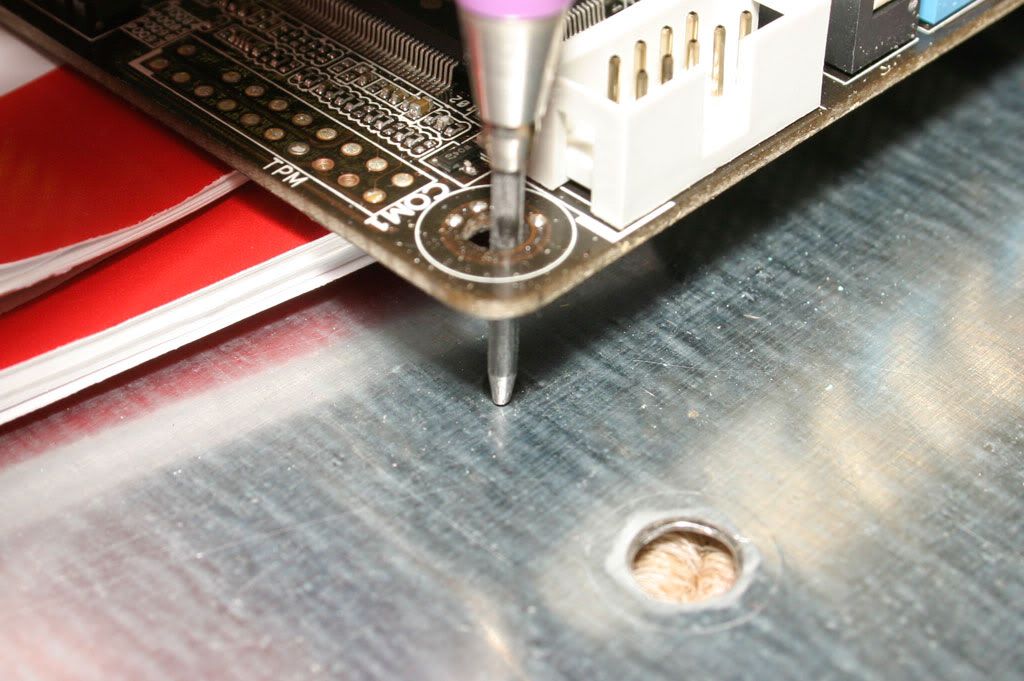
Marking things up for some drilling.
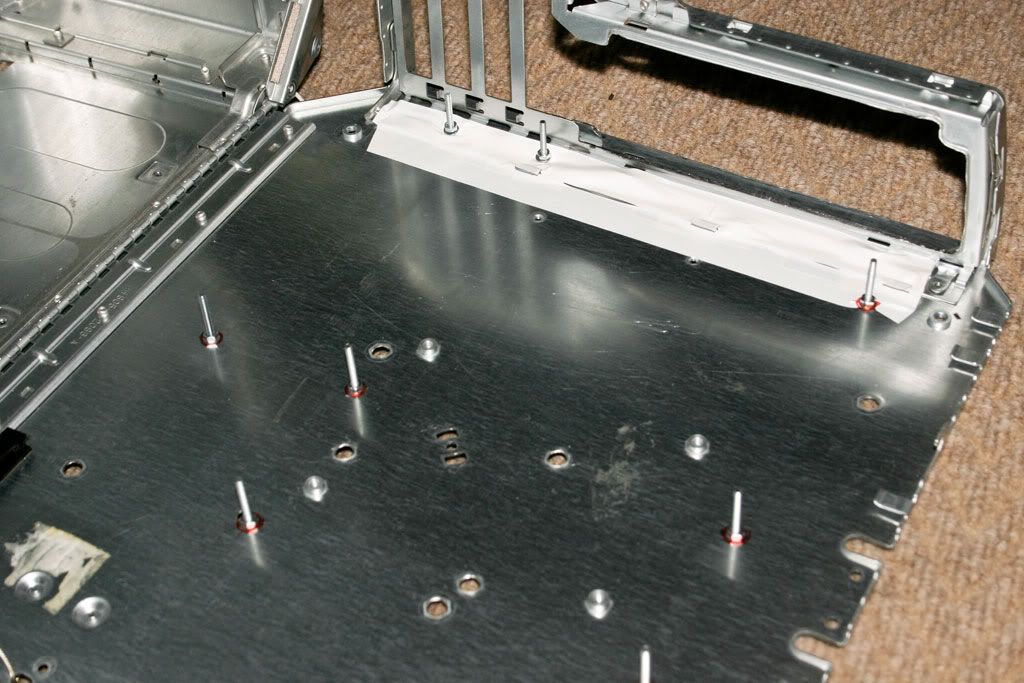
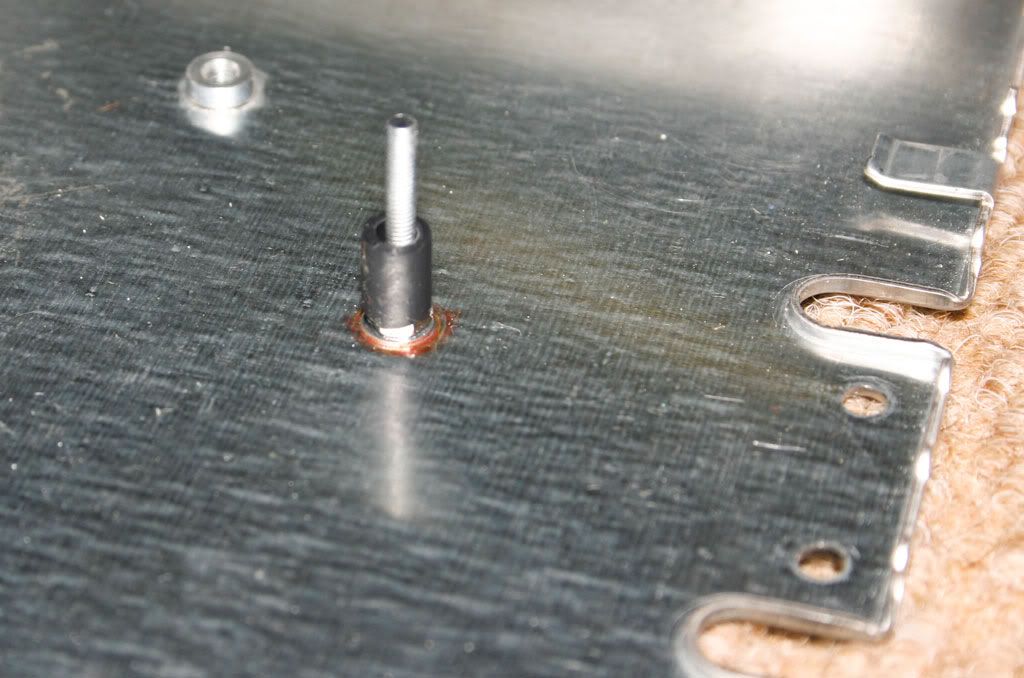
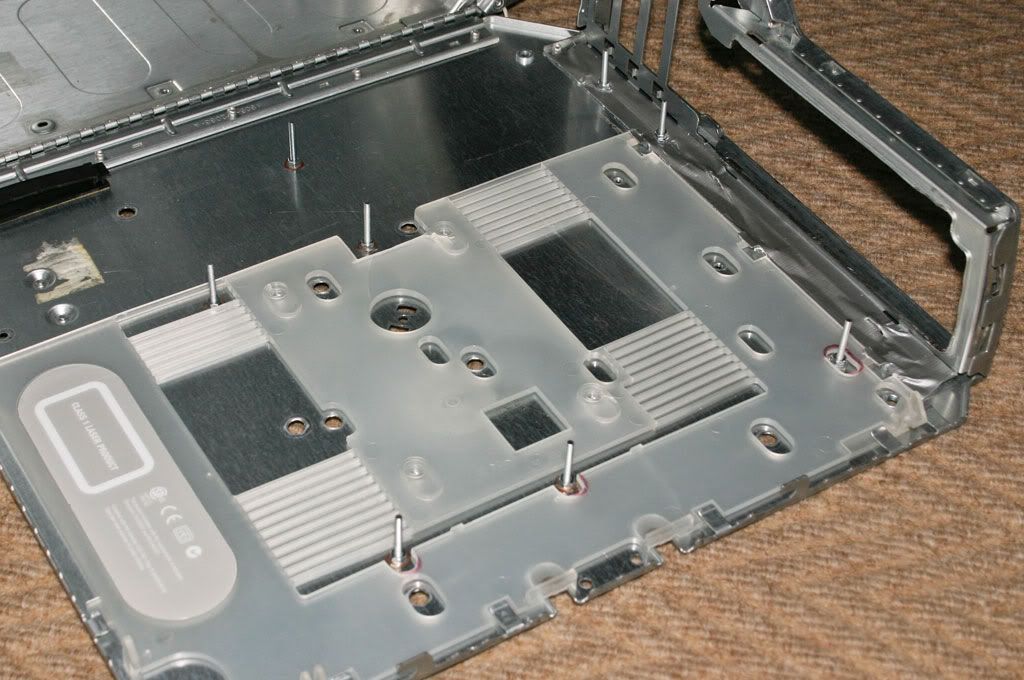
Drilled and screwed in some make-shift standoffs
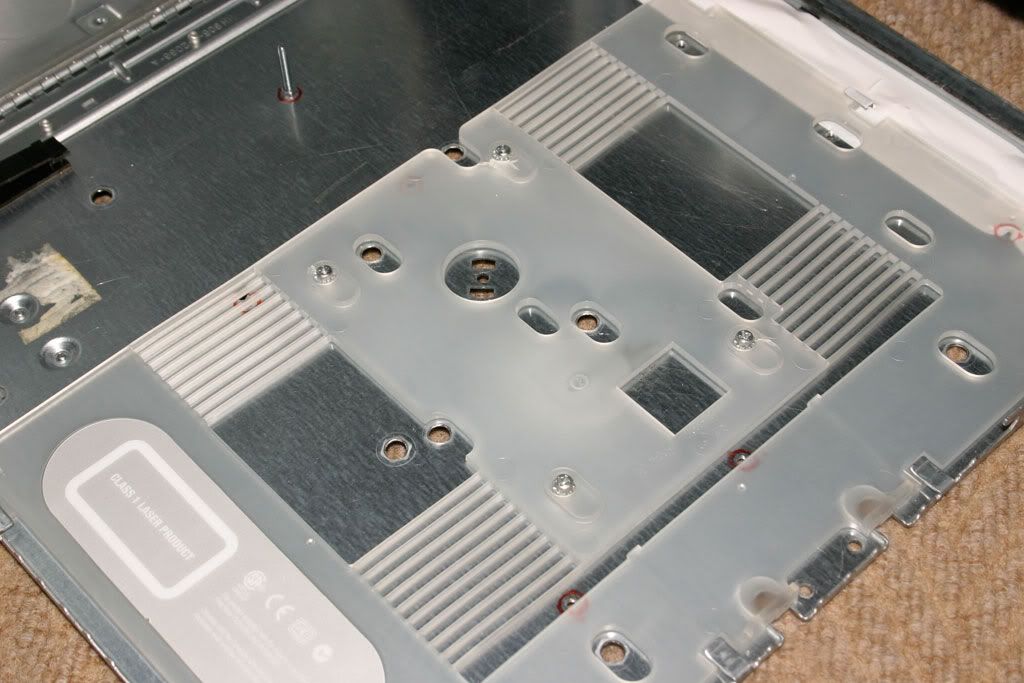
Door plate thing back in place. And we can see some new holes are needed for our new standoffs
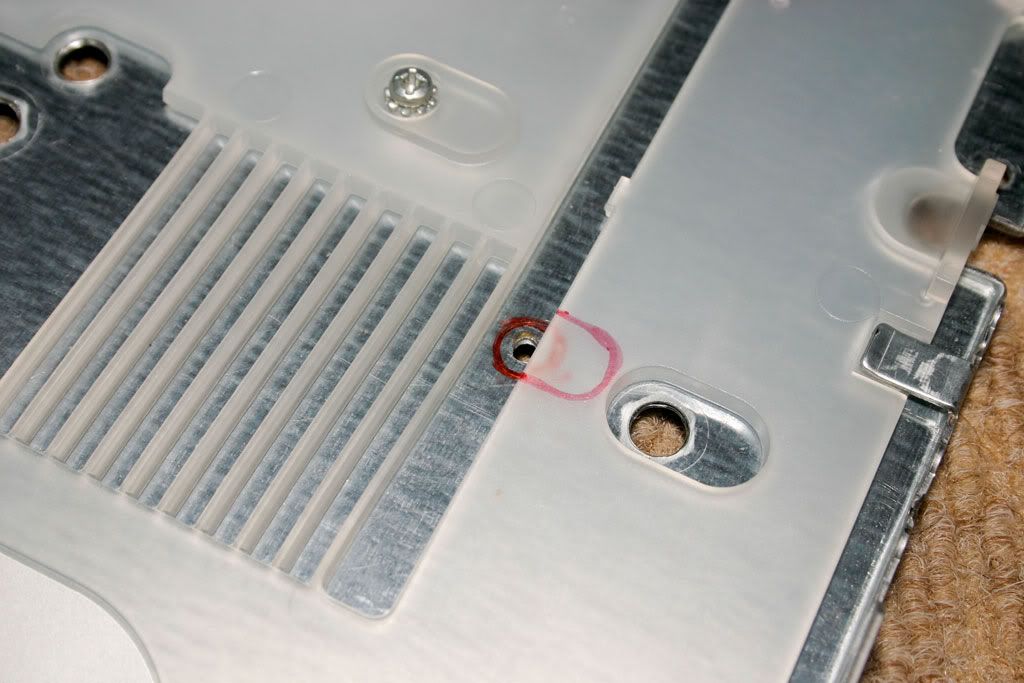
Marked for some more drilling & cutting. Yippee!
Standoffs and door plate playing together nicely. Whew!

Here I drilled the hell out of the area next to the side intake fan of the PSU. Thought that some fresh air incoming air in this spot would make a bit of a difference. I think it did.
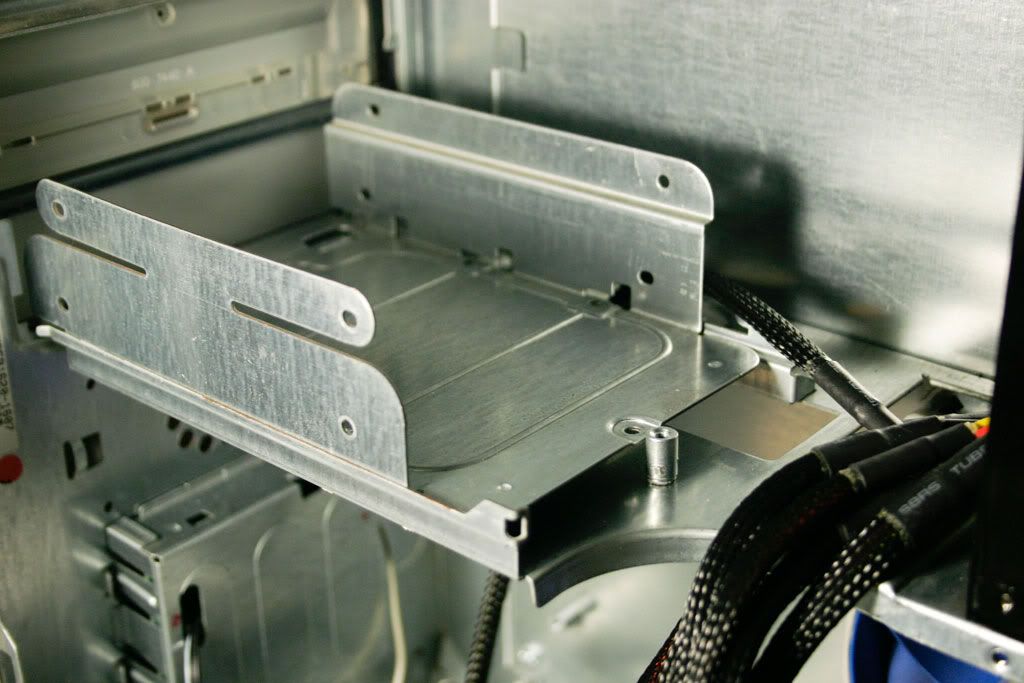
This was my relocated HDD drive caddy to go with my old (BearUp Lake) motherboard configuration. I shortened one of the old standoffs, drilled a small hole in the tray/divider and had it screwed from both sides to hold the caddy in place and keep it removable. This shot is of the original test fitting. The caddy actually slotted into that space really nicely and work quite well, until I decided to go back to using a DVD drive with my updated motherboard setup.

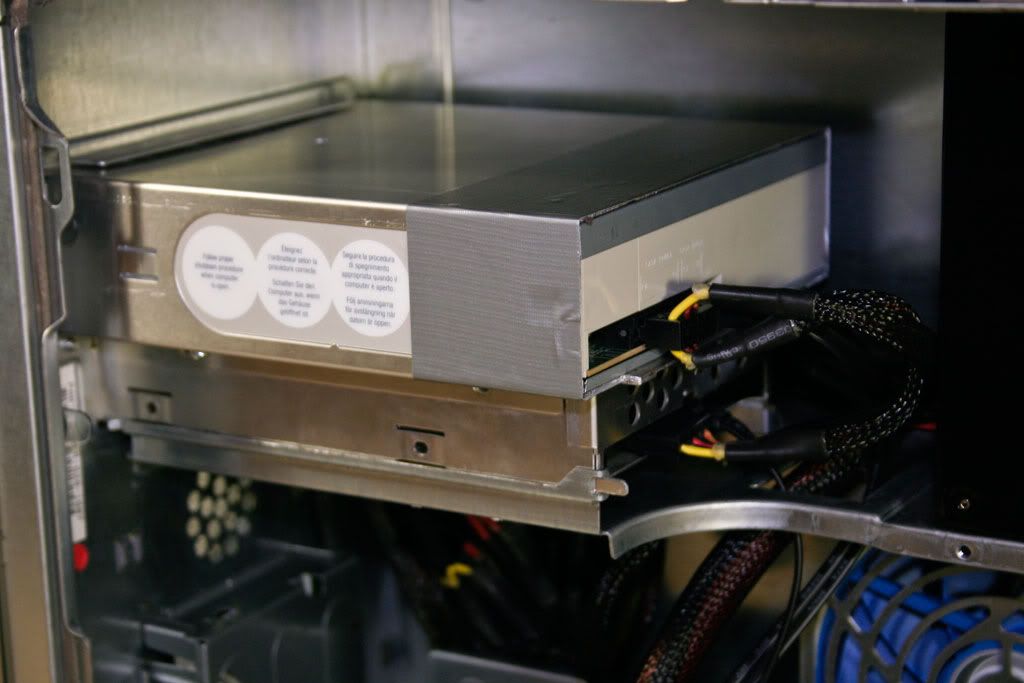
Okay months later, here's the DVD drive back in place. Also snuck my SSD HDD in there too. I cut the optical drive bay to fit the exact length of the optical drive. And insulated the end part due to a couple of motherboard diodes "just" touching when the side door is closed. We're talking millimetres here and I'm not taking ANY chances...

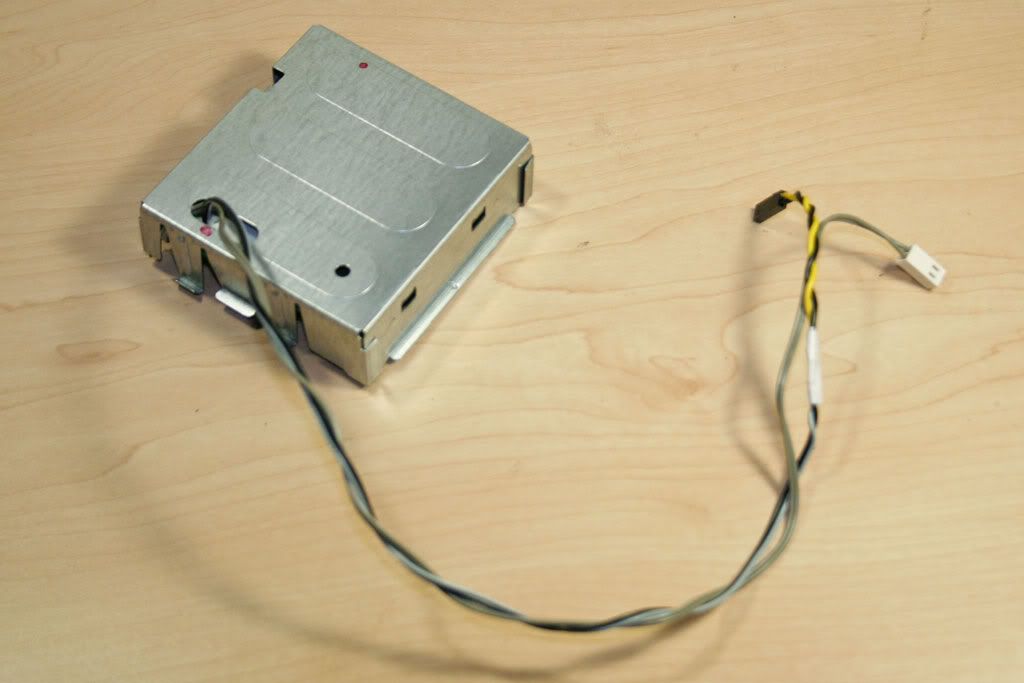
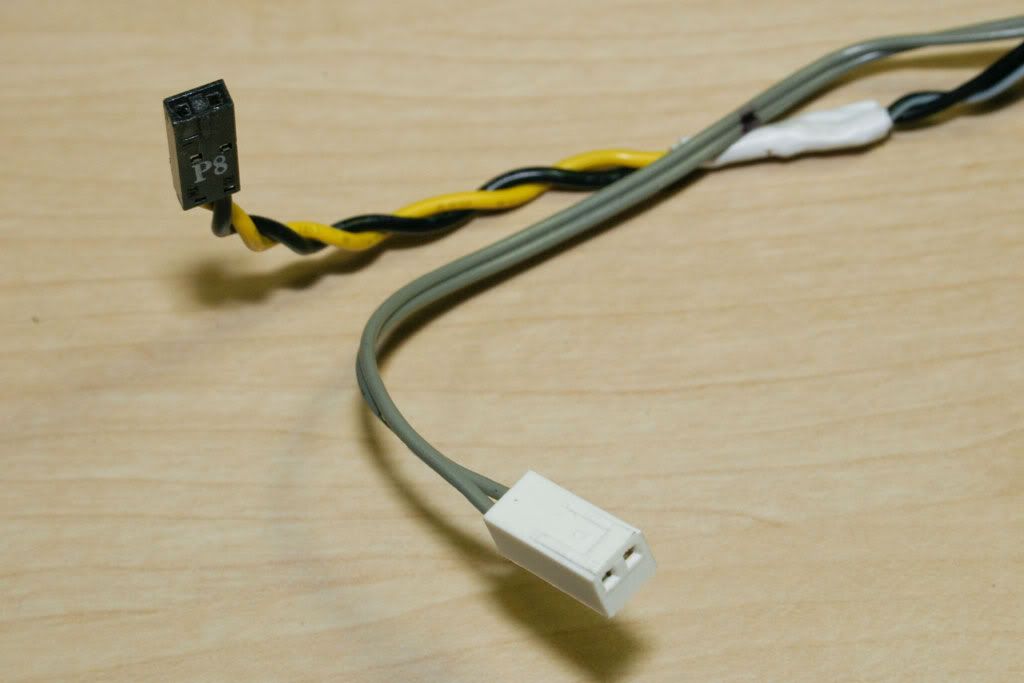
Some dodgy soldering and equally dodgy electronic work later I got the power button and power LED hooked up and working. Thanks to some of the geniuses on these forums this wasn't the disaster it could have been. Thanks guys! You rock!
The original fan holder unit makes for some on-the-fly-cable management
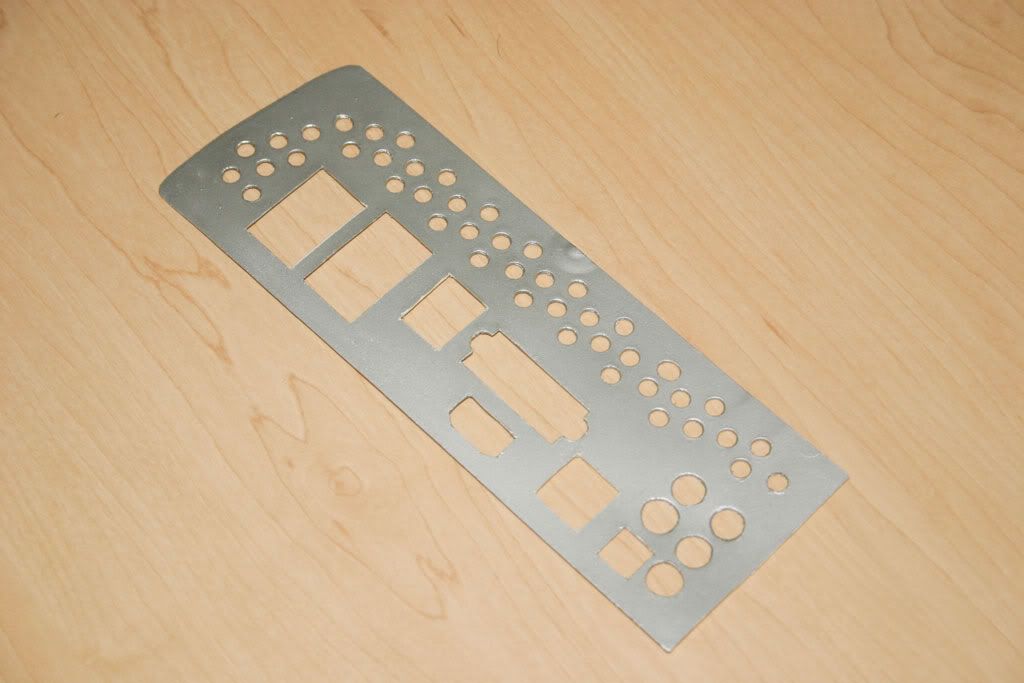
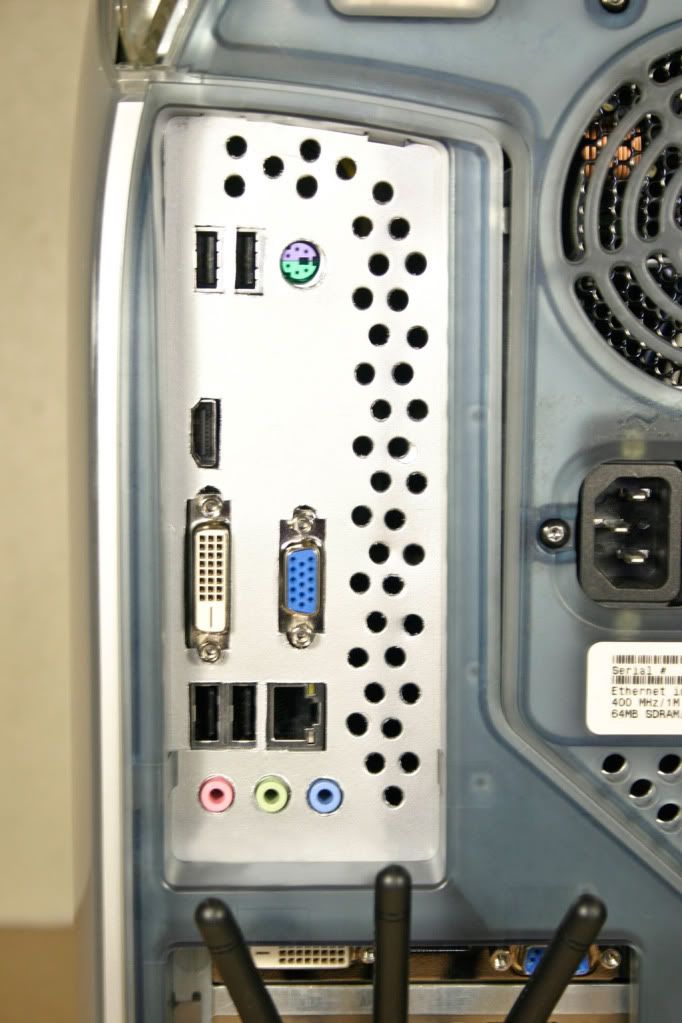
Got creative with a custom IO Panel. Fabricated a few out of card first and refined them before moving over to 1mm plastic and a coat of aluminium spray paint. I think it keeps the look in line with the original Apple IO Panel quite nicely. You can see the first version was for my Intel motherboard while the final was for the MSI motherboard. Hopefully going to try a proper metal version or get one laser cut when I get some more time...
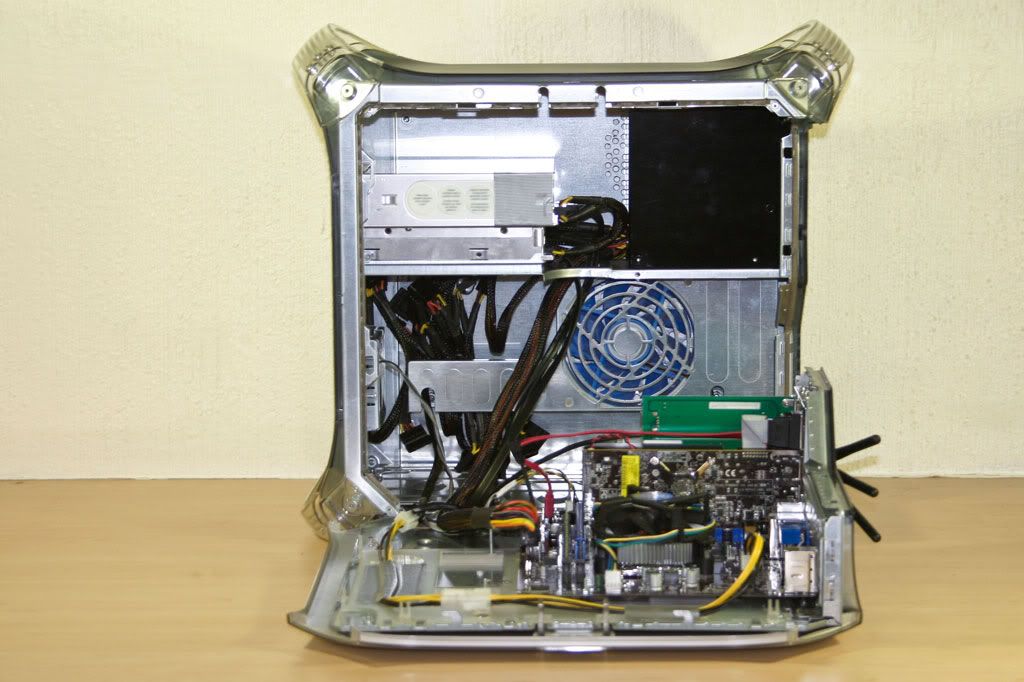
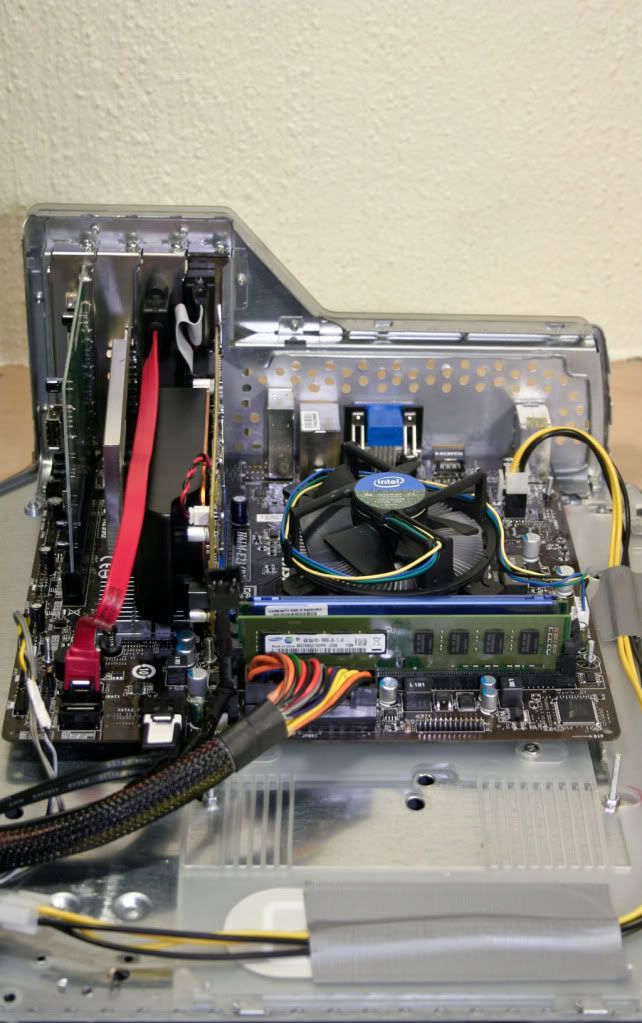
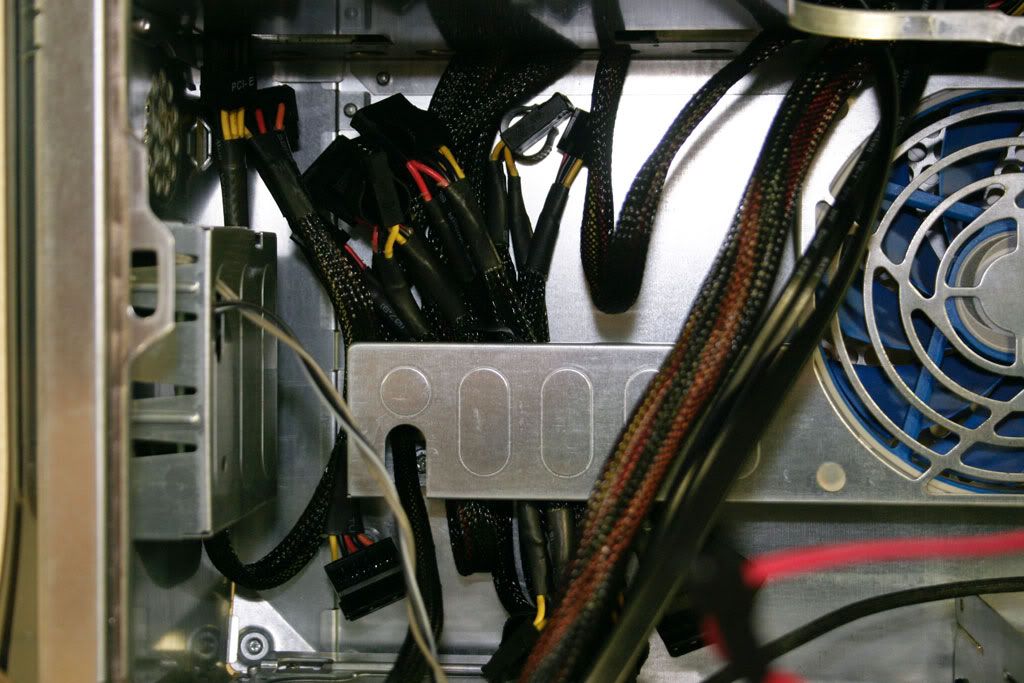
Everything in place! Here you can see the MSI motherboard firmly in place with everything else.
Notice the narrower board and how there are now un-used standoffs, which allows me to keep the optical drive bay in it's original place. WIN!
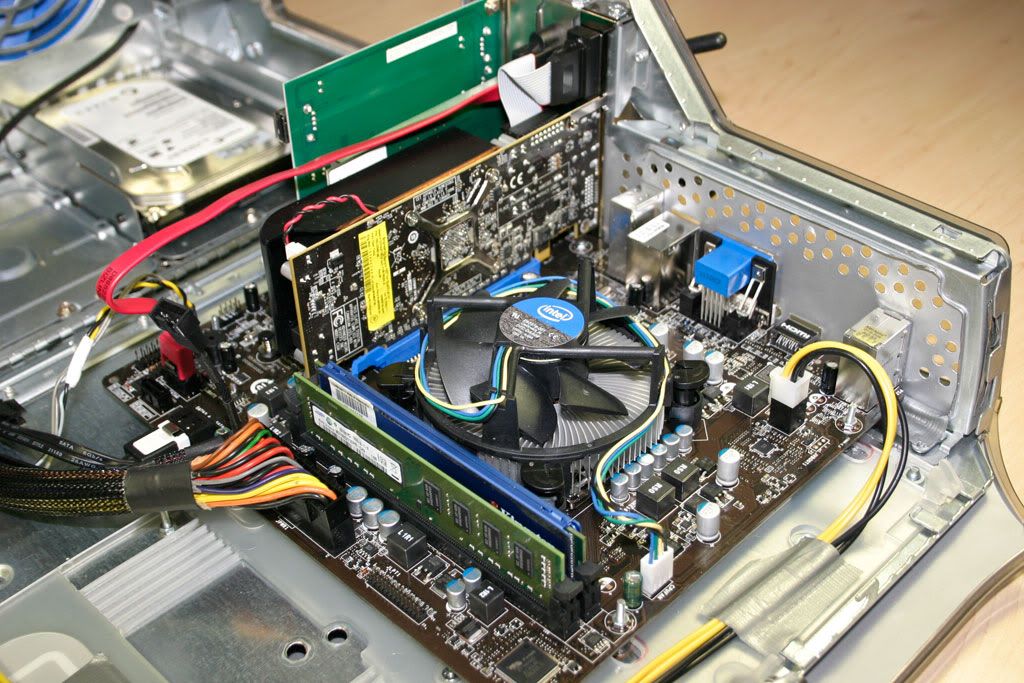
Also note the gap between the GPU card and the rear 3-ports audio IO.
Not many LGA 1155 mATX motherboards have this gap, yet this is the key to having just the right gap at the back of your build to keep things aligned on either side of the PCI Port / IO Port divider and looking neat and tidy – without cutting that is. Besides, I'm never going to need a rear 6-port audio IO anyway.
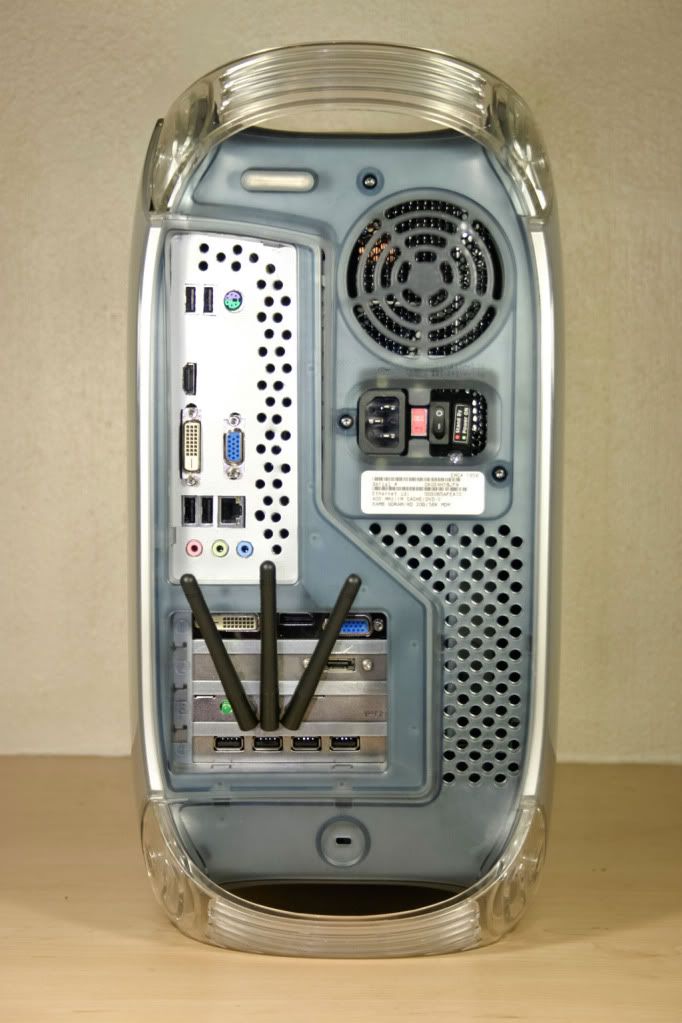
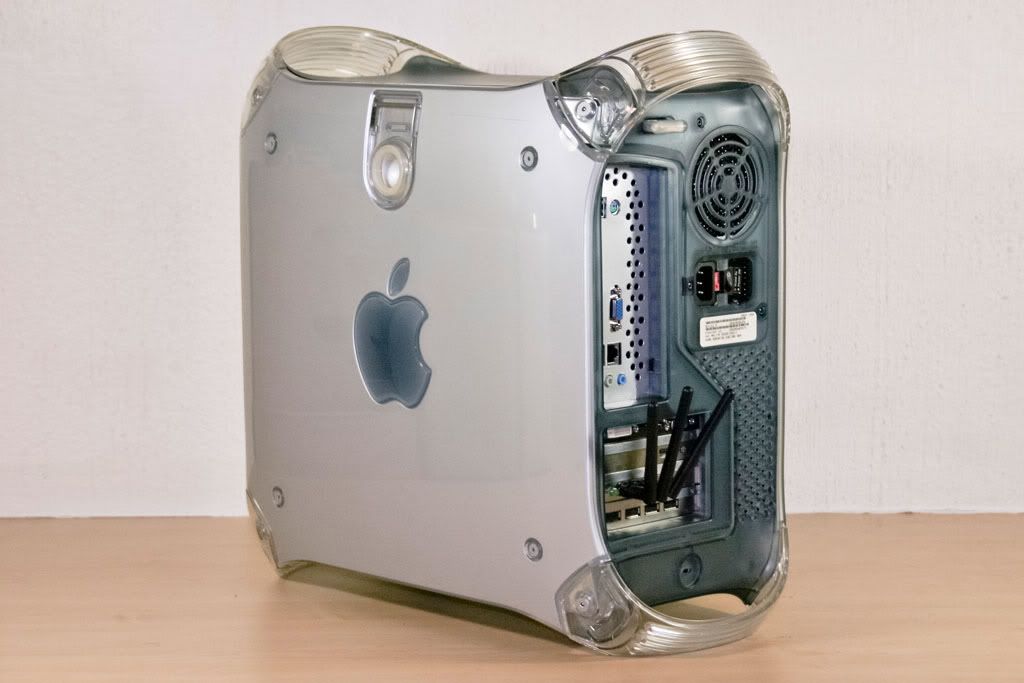
And there you have it. Pretty as ever and thrilled to have my old friend back up and running.
Overall
Performance is quite amazing and temps are running lower than expected, considering the design and airflow of these cases. The fans run pretty quiet, well... no more noisy that the original system. CPU is about 19-22°C at idle and GPU is hovering around 32°C. I haven't put the system under serious stress yet, but will try and run some Handbrake conversions tonight and report back some temps then.
Either way, I've already drilled a series of holes into the bottom of the case (like I did with the side panel) under the HDD trays incase I need another fan to pull in even more air. But in general my use for this setup shouldn't generate too much heat and I'm not planning to overclock until i'm desperate for a bump in performance.
On the Hackintosh side, I couldn't be happier! Lion 10.7.3 is running like a dream, the Radeon HD 6670 is working perfectly (after some Kext editing); Audio is perfect (thanks to Toleda); WiFi is native; Sleep, C&P States and CPU Power Management are working like a charm; and the Power Button even blinks when the system is asleep - It's the small things...
Looking forward to my G5 Build later this year. Yay!

So my PowerMac G4 (Gigabit Ethernet) finally died last year.
After 11 years of excellent service and number of incremental upgrades (e.g. CPU, GPU, RAM) I really could not have asked more of the little guy. It was the PSU that eventually just said, "Sod it!" and croaked. While I could have trawled eBay for another one, let's face it, why the hell would I fork out a small fortune just to resuscitate an 11-year-old computer – as awesome as it was.
It was time to make a call, throw my beloved onto a recycling pile or give it another REAL shot at life. Well, I would't be here today if the recycling dump had claimed another victim, now would I? I loved that little sucker after all!
Components
Chassis: Apple Powermac G4 (Gigabit Ethernet)
CPU: Intel Core i5-2500k + Boxed CPU Cooler
GPU: AMD Radeon HD 6670 1GB (Reference card)
Motherboard: MSI H61M-E23 (B3)
Memory: Kingston Value Ram DDR3-1333 – 2x 4GB
WiFi: D-Link Xtreme N PCIe Adapter (DWA-556) For native WiFi in OS X.
HDD1: Kingston 128GB SSD
HDD2: Seagate Barracuda 2TB Green
PSU: Thermaltake TR2-500w
Fan: DeepCool UF-120
USB: D-Link 5x USB 2.0 PCI card This will be replaced with either a USB 3.0 or SATA III card soon.
eSATA: SATA-to-eSATA cable with PCI mounting bracket
The Build
Back to the beginning... we had a few extra AMD Phenom x4 965s lying around the office so my journey actually began with an AMD based system. I promptly picked up a nice AM3 Motherboard, some fans, a heatsink and a PSU and got to work. But to cut a long story short, before I'd properly mounted this setup into my G4, I had already negotiated a generous swap (with my boss) for an Intel Core i5 2500k + "BearUp Lake" mobo, which pretty much guaranteed that this was going to be a proper Intel-based Hackintosh. Oh yeah!
And so began the build... in earnest.
I mostly finished this guy around the New Year, but I wasn't 100% happy with the entire setup. The mobo was too wide so I had the classic problem with the second set of (empty) RAM slots crashing into the G4's optical bay enclosure, which I removed and installed my HDDs into (documented later). I also had the ol' Audio IO ports pushing into the PCI slot divider problem. While this was by no means a deal breaker, these things bugged the hell out of me. Grrr.
So last, I coughed up for a smaller MSI H61M-E23 (B3) mobo to solve these two issues and spent Saturday FINALLY get my G4 up to 100%. Of course I have already begun with the planning stages for my next project – a G5 chassis. I've got some great ideas, which will hopefully work out nicely... but first here's my G4 --> i5 Rebirth.
Enjoy...
First Cuts. Oh my! I'm actually doing this!
Snap, Crackle 'n' Pop. There go the original mono standoffs...
Yup! That ol' AirPort Card holder has to go too..
Some more cutting ahead. Here I used the existing indentation to guide me. I have plans for that there IO opening...
A quick test fit to see how things are lining-up.
Yup! I KNEW IT! Darn Audio IO Ports were gonna be a bugger. Oh, Well!
My very pink technical pencil. Yay!
Marking things up for some drilling.
Drilled and screwed in some make-shift standoffs
Door plate thing back in place. And we can see some new holes are needed for our new standoffs
Marked for some more drilling & cutting. Yippee!
Standoffs and door plate playing together nicely. Whew!
Here I drilled the hell out of the area next to the side intake fan of the PSU. Thought that some fresh air incoming air in this spot would make a bit of a difference. I think it did.
This was my relocated HDD drive caddy to go with my old (BearUp Lake) motherboard configuration. I shortened one of the old standoffs, drilled a small hole in the tray/divider and had it screwed from both sides to hold the caddy in place and keep it removable. This shot is of the original test fitting. The caddy actually slotted into that space really nicely and work quite well, until I decided to go back to using a DVD drive with my updated motherboard setup.
Okay months later, here's the DVD drive back in place. Also snuck my SSD HDD in there too. I cut the optical drive bay to fit the exact length of the optical drive. And insulated the end part due to a couple of motherboard diodes "just" touching when the side door is closed. We're talking millimetres here and I'm not taking ANY chances...
Some dodgy soldering and equally dodgy electronic work later I got the power button and power LED hooked up and working. Thanks to some of the geniuses on these forums this wasn't the disaster it could have been. Thanks guys! You rock!
The original fan holder unit makes for some on-the-fly-cable management
Got creative with a custom IO Panel. Fabricated a few out of card first and refined them before moving over to 1mm plastic and a coat of aluminium spray paint. I think it keeps the look in line with the original Apple IO Panel quite nicely. You can see the first version was for my Intel motherboard while the final was for the MSI motherboard. Hopefully going to try a proper metal version or get one laser cut when I get some more time...
Everything in place! Here you can see the MSI motherboard firmly in place with everything else.
Notice the narrower board and how there are now un-used standoffs, which allows me to keep the optical drive bay in it's original place. WIN!
Also note the gap between the GPU card and the rear 3-ports audio IO.
Not many LGA 1155 mATX motherboards have this gap, yet this is the key to having just the right gap at the back of your build to keep things aligned on either side of the PCI Port / IO Port divider and looking neat and tidy – without cutting that is. Besides, I'm never going to need a rear 6-port audio IO anyway.
And there you have it. Pretty as ever and thrilled to have my old friend back up and running.
Overall
Performance is quite amazing and temps are running lower than expected, considering the design and airflow of these cases. The fans run pretty quiet, well... no more noisy that the original system. CPU is about 19-22°C at idle and GPU is hovering around 32°C. I haven't put the system under serious stress yet, but will try and run some Handbrake conversions tonight and report back some temps then.
Either way, I've already drilled a series of holes into the bottom of the case (like I did with the side panel) under the HDD trays incase I need another fan to pull in even more air. But in general my use for this setup shouldn't generate too much heat and I'm not planning to overclock until i'm desperate for a bump in performance.
On the Hackintosh side, I couldn't be happier! Lion 10.7.3 is running like a dream, the Radeon HD 6670 is working perfectly (after some Kext editing); Audio is perfect (thanks to Toleda); WiFi is native; Sleep, C&P States and CPU Power Management are working like a charm; and the Power Button even blinks when the system is asleep - It's the small things...
Looking forward to my G5 Build later this year. Yay!
