- Joined
- Apr 5, 2012
- Messages
- 119
- Motherboard
- MSI Z270 Gaming Pro Carbon
- CPU
- i5-7600
- Graphics
- RX 570
- Mobile Phone
Clover is a great boot loader, and tonymacx86 has developed some great tools to get you up and running. However, some people are still having problems. I think a lot of this has to do with the design of the systems. Many have extra backup internal hard drives or partitions with legacy boot loaders or previous Clover systems. While this may have been fine in the past, with Clover and the newer OS X's, this does not work on many motherboards.
Often it happens that Clover and El Capitan (or Yosemite) will install and seem to work fine, but then degenerate to an unusable state. I chased this problem for quite a while before I found the solution (see Source #1 below).
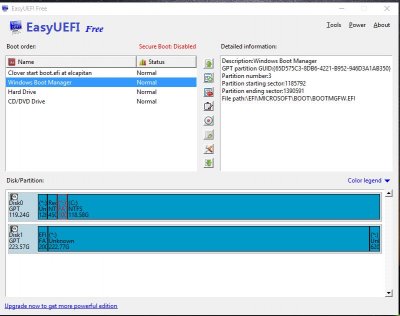
Look at the boot options list in your BIOS. If you see entries that are not physical drives, it is likely that you are encountering some form of this problem.
First, remove all of the extra boot entries.
2b. If you cannot get to Clover, reset your CMOS and try again, this time going into the BIOS and selecting your physical drive for boot override. DO NOT touch any other entries at this point as it may lock the BIOS and you will need to reset the CMOS and start over again. It SHOULD work, so keep trying – I don't know another way.
3. Use the right and left arrow keys to select the Clover UEFI Shell and hit enter. The following screen should appear, and either let it time out, or press a key:

4. At the Shell> prompt type
the results should look something like this:

5. You need to remove any entry that is not a physical hard drive. As far as I know, if it is a real physical disk, it will list as DevPath - HD.

The code to remove an entry looks like this:
where XX is the Option number. In this example, I remove Option 02 with
.

If you have a LOT of bogus entries, it is best to do just a few, and then type the command
again before repeating the process. When I first did this on my ASUS H97 board, I had at least 10 entries to clear so it took several iterations of this process.
6. When your have removed all entries that are not physical hard drives, type
and press the return key. This will get you back to the main Clover screen. At this point, I would choose restart from the Clover choices and enter the BIOS to check if your work was successful.
Second, rethink your system design and backup scheme to prevent this from happening again.
Source #1 - Thanks to trioset on InsanelyMac
Often it happens that Clover and El Capitan (or Yosemite) will install and seem to work fine, but then degenerate to an unusable state. I chased this problem for quite a while before I found the solution (see Source #1 below).
Look at the boot options list in your BIOS. If you see entries that are not physical drives, it is likely that you are encountering some form of this problem.
First, remove all of the extra boot entries.
0. You COULD try to reflash the BIOS and you MAY be done. This worked on my 6 series board, but not on my current 9 series. If it works for you, skip to the second section on preventing the problem from happening again. If this does not work, or if you really don't want to have to flash the BIOS, then continue.
1. Disconnect all drives except one with only one instance of Clover. If you only have a partitioned drive with ANY backups on the partitions, it is probably best to boot with only the Clover Install USB stick and no other drives attached.
2. Boot your system and press the right arrow key when the Clover boot loader appears.
2b. If you cannot get to Clover, reset your CMOS and try again, this time going into the BIOS and selecting your physical drive for boot override. DO NOT touch any other entries at this point as it may lock the BIOS and you will need to reset the CMOS and start over again. It SHOULD work, so keep trying – I don't know another way.
3. Use the right and left arrow keys to select the Clover UEFI Shell and hit enter. The following screen should appear, and either let it time out, or press a key:
4. At the Shell> prompt type
Code:
bcfg boot dump
5. You need to remove any entry that is not a physical hard drive. As far as I know, if it is a real physical disk, it will list as DevPath - HD.
The code to remove an entry looks like this:
Code:
bcfg boot rm XX
Code:
bcfg boot rm 02If you have a LOT of bogus entries, it is best to do just a few, and then type the command
Code:
bcfg boot dump6. When your have removed all entries that are not physical hard drives, type
Code:
exit
• Design your system so that there is only one disk (an SSD if you like speed) that has an EFI partition that contains the Clover boot loader. Of course in OS X, all (I think) formatted drives will have an EFI partition, but you do not want two EFI partitions that contain ANY boot loader – that includes Clover, Chameleon, Chimera or whatever.
• On some boards, it may help to set the boot options for all devices to UEFI Only (didn't make a difference on my board, but did speed up boot time).
• Currently, I have a 250 GB M.2 SSD as my boot disk, and the others are just for data. For backups I use EXTERNAL DISKS, so that I don't reencounter the same problems. The external drives are connected only when I need to backup. [I am working on a GUIDE for Clonezilla.] External USB 2.0 or USB 3.0 drive enclosures are quite reasonably priced at the moment, so I encourage you to do this as well. I think you could use Time Machine for data backup, but I have no experience with this.
• Currently I am only running Mac OS X 10.11 El Capitan. It would be great to hear about successful system designs in the same way I am discussing here from others who are also running Windows, Linux or other versions of Mac OS X
Source #1 - Thanks to trioset on InsanelyMac


")