
- Joined
- Mar 7, 2021
- Messages
- 39
- Motherboard
- Gigabyte Z390 Designare
- CPU
- i9 > Need full model > See Rules!
- Graphics
- RTX 3060
- Mac
- Mobile Phone
Hello to everyone reading this.
I always wanted to build my very first PC/hackintosh in a iconic Mac Pro. So, after many years looking on this forum how others did it, I started to look for the things I needed for the build.
First I found the Mac Pro 1.1 case that was already been striped of the inside.
But later on I bought a working one that was sadly dead because the RAM stopped working. So I had the parts I didn't have from the first case plus, if I made a mistake I had a spare case.
But that started the most hardest part for me, having never ever built a PC or hackintosh from scratch before - which PC parts to use.
After looking and doing some research, I have chosen the following PC parts:
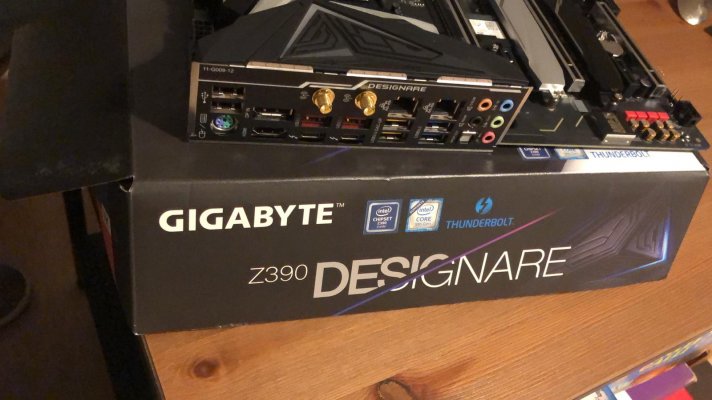
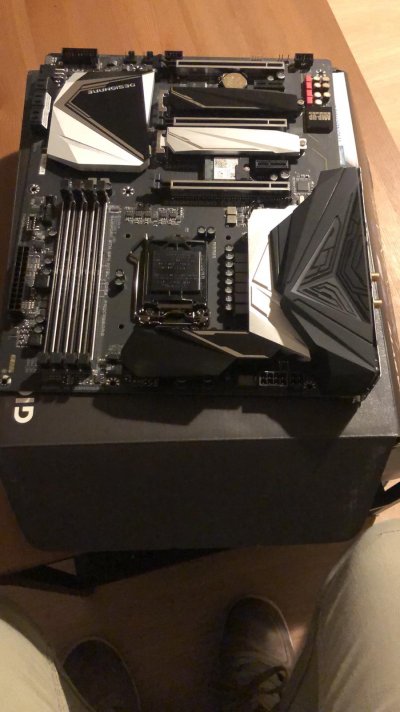
Motherboard: Gigabyte Z390 Designare
Processor: Intel i9-9900K V2.0, 3.6 GHz (5,0 GHz Turbo Boost) socket 1151 processor
Processor Cooler: Noctua NH-D15 Chromax.black CPU-cooler
Graphics Card: Gigabyte 1050 Ti 8GB (later on I want to put also an AMD Graphics card in the case, but the prices are to steep for me now.)
RAM: HyperX 16GB DDR4-3600 kit
Power supply: Seasonic Focus GX 750w
3 120mm fans: Noctua NF-F12 PWM Chromax.Black.Swap case fan
1 40mm fan: Noctua NF-A4x10 5V case fan (sadly, they don't sell them in black or grey that small, but you can see it, I think, when the build is done.)
SSD: Samsung 860 EVO, 1 TB SSD
HD: Seagate Barracuda 2 TB Hard Drive
At the moment I am still getting the parts slowly, a few parts at a time.
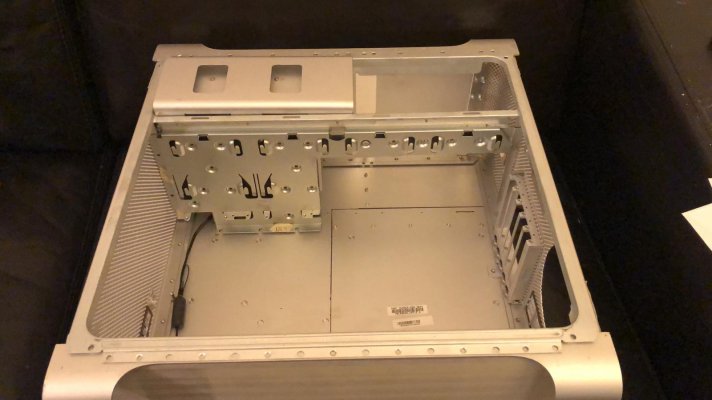
The first thing I did was taking the hole Mac Pro case apart.
Because I am using a full ATX motherboard, I measured how must I needed to cut for the plate where the DVD and power supply bay's lay on.

Then I needed a PC case to take the back I/O plate from. Luckily, a colleague from work had to one which I could take off his hands for free.
And did this:

I wanted to see how it would look on the back, so...

Plus how far down I could go with the back io plate.

Because I wanted to keep the original look outside as inside, I had to fill up the back I/O plate with milli puty and tamiya putty to get it as seamless possible.


.jpeg")


Then I made a template of the back I/O plate with some cardboard in order to outline where I needed to cut the back plate of the case.

The original PC slots I needed to take out before I can cut the size for the new back io plate.
.jpeg")


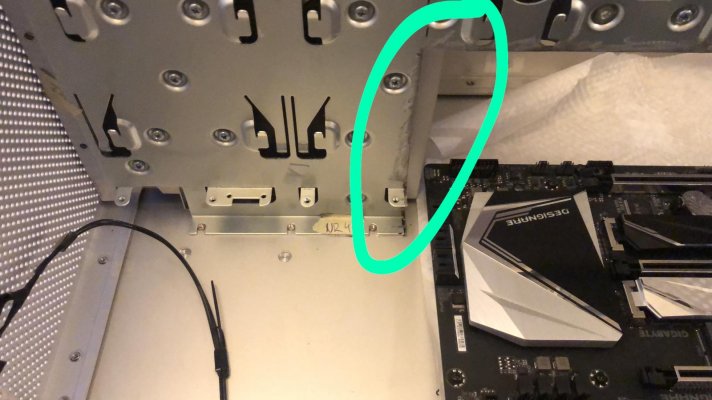
Further more I noticed that the motherboard could not fully get to the back of the case due to the bay shelf support. So I measured it where I needed to cut.


then i went to see if I could leave the original fan position intact without cutting and i think i can hopefully.


I also removed a few of the small stand-offs that where from supporting the dvd/power supply plate where i cut it away so the motherboard could go better to the back.
next few case modding steps for the following day's

1). i think that i dont need to chance anything there but if so it would be a small chance
2) is going to take a lot of work making it fit over the motherboard with out making contact with.

cutting the back for the new back io plate, but before i do that i want to glue the motherboard stand-off's in place.
I am planning on painting the case when i am doing modding it.
This is how far i gotten so far.
hope to update this post as soon as possible, and hope you all like the build so far let me know what you guy's and girl's think of it so far.
I always wanted to build my very first PC/hackintosh in a iconic Mac Pro. So, after many years looking on this forum how others did it, I started to look for the things I needed for the build.
First I found the Mac Pro 1.1 case that was already been striped of the inside.
But later on I bought a working one that was sadly dead because the RAM stopped working. So I had the parts I didn't have from the first case plus, if I made a mistake I had a spare case.
But that started the most hardest part for me, having never ever built a PC or hackintosh from scratch before - which PC parts to use.
After looking and doing some research, I have chosen the following PC parts:
Motherboard: Gigabyte Z390 Designare
Processor: Intel i9-9900K V2.0, 3.6 GHz (5,0 GHz Turbo Boost) socket 1151 processor
Processor Cooler: Noctua NH-D15 Chromax.black CPU-cooler
Graphics Card: Gigabyte 1050 Ti 8GB (later on I want to put also an AMD Graphics card in the case, but the prices are to steep for me now.)
RAM: HyperX 16GB DDR4-3600 kit
Power supply: Seasonic Focus GX 750w
3 120mm fans: Noctua NF-F12 PWM Chromax.Black.Swap case fan
1 40mm fan: Noctua NF-A4x10 5V case fan (sadly, they don't sell them in black or grey that small, but you can see it, I think, when the build is done.)
SSD: Samsung 860 EVO, 1 TB SSD
HD: Seagate Barracuda 2 TB Hard Drive
At the moment I am still getting the parts slowly, a few parts at a time.
The first thing I did was taking the hole Mac Pro case apart.
Because I am using a full ATX motherboard, I measured how must I needed to cut for the plate where the DVD and power supply bay's lay on.
Then I needed a PC case to take the back I/O plate from. Luckily, a colleague from work had to one which I could take off his hands for free.
And did this:
I wanted to see how it would look on the back, so...
Plus how far down I could go with the back io plate.
Because I wanted to keep the original look outside as inside, I had to fill up the back I/O plate with milli puty and tamiya putty to get it as seamless possible.
Then I made a template of the back I/O plate with some cardboard in order to outline where I needed to cut the back plate of the case.
The original PC slots I needed to take out before I can cut the size for the new back io plate.
Further more I noticed that the motherboard could not fully get to the back of the case due to the bay shelf support. So I measured it where I needed to cut.
then i went to see if I could leave the original fan position intact without cutting and i think i can hopefully.
I also removed a few of the small stand-offs that where from supporting the dvd/power supply plate where i cut it away so the motherboard could go better to the back.
next few case modding steps for the following day's
1). i think that i dont need to chance anything there but if so it would be a small chance
2) is going to take a lot of work making it fit over the motherboard with out making contact with.
cutting the back for the new back io plate,
I am planning on painting the case when i am doing modding it.
This is how far i gotten so far.
hope to update this post as soon as possible, and hope you all like the build so far let me know what you guy's and girl's think of it so far.
Attachments
-
 WhatsApp Image 2021-02-07 at 21.12.07.jpeg115 KB · Views: 197
 -
 WhatsApp Image 2021-03-06 at 23.48.09.jpeg144.8 KB · Views: 187
 -
 WhatsApp Image 2021-03-06 at 23.48.10.jpeg142.6 KB · Views: 196
 -
 WhatsApp Image 2021-03-07 at 18.34.58.jpeg149.5 KB · Views: 212
 -
 WhatsApp Image 2021-03-07 at 18.34.59.jpeg139.5 KB · Views: 222
Last edited:


